


How to Preserve Food for Future Consumption
Using Three Simple Old Fashioned Methods
Copyright © May 7, 2010 by Robert Wayne Atkins, P.E.
All Rights Reserved.
Basic Food Safety Precautions
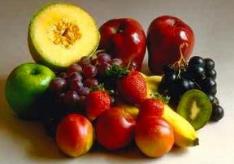
- Wash your hands thoroughly before handling any type of food.
- Rinse the raw food thoroughly before processing and storing it.
- Use clean food processing equipment.
- Always wash the utensils before using them on a different food item to prevent a problem of cross-contamination.
- Use clean storage containers.
- Examine the food carefully and discard any food that has mold or bruises or slime or insects or other problems.
- The shelf life of the food will not be extended forever, but it can be increased by a few weeks to a few months (or longer depending on the food item and the preservation method).
The Three Traditional Food Preservation Methods
There are three simple ways to preserve food using traditional old fashioned procedures that do not require any special chemicals, or salt, or equipment:
- In the ground.
- In a root cellar.
- Drying.
Let's examine each of the above three methods one at a time.
In the Ground
(Appropriate for Carrots and Radishes in the Fall)
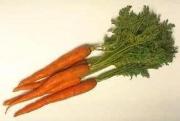 Leave the vegetables in the original ground where they grew during the summer.
This technique works well with carrots and radishes.
Mulch the ground above the vegetables with a thick layer of straw.
However, if the weather has not yet turned cold and you leave radishes in the ground then they will go to seed.
In a Root Cellar
(Appropriate for Some Vegetables and Some Fruits)
A root cellar is a cool dry dark place underground where the temperature remains between 40°F to 60°F (or 4°C to 15°C).
- The depth of the root cellar below ground will vary between 1 to 3 feet depending on the frost line in the area where you live. The frost line is how deep the ground freezes in winter.
- Humidity must be controlled.
- Insects and rodents must be kept out.
A simple root cellar can be made from a clean empty food grade 55 gallon drum. Plant the drum sideways below ground under at least 12 inches of dirt. Put the food in the drum and then attach the drum lid. Shovel some dirt against the lid to keep it cool inside the drum. The drum will stay cool and it will keep out the air and insects and rodents. Do not place the fruit or vegetables directly against the sides of the drum. Instead store the fruit or vegetables inside wood boxes inside the drum.
Apples, peaches, pears, plums, and tomatoes release ethylene gas while in storage and this gas will cause other foods to ripen and spoil more rapidly. Therefore they should be stored by themselves and not with other foods.
Apples: Store apples in crates no more than three apples high per crate. The crates should be stored on a high shelf in the root cellar.
Cabbage: Remove the roots and the exterior leaves. Store upside down one layer high loosely packed in crates. Cover the crate with a tarp or sheet of plastic.
Carrots: Cut off the crown. Rinse thoroughly. Stack upright in a plastic or wood box and cover with newspaper.
Corn, Stowell’s Heirloom Evergreen White Corn: Before the corn is fully ripe pull up the stalks with the roots still attached and store them upside down inside your root cellar. The corn will continue to ripen over several months. Therefore, you will be able to eat fresh corn-on-the-cob for between three to five more months. That is the reason it is called "evergreen corn." (Note: After the corn has fully ripened, if you will peel back the husks on one ear of corn on three or four different stalks and then allow the corn to dry on the cob you will have "corn seed" to plant in the spring. Twist the corn kernels off the cobs using your hands and discard the small kernels near the end of the ear. Save the bigger corn kernels and plant them to produce another fresh crop of corn.)
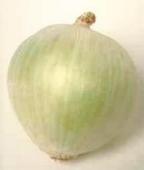 Onions: Allow them to dry thoroughly. Then tie them together in small bunches and hang them upside down from a string or a wire. White and yellow onions store well but red onions do not store well.
Pears: Pears are not ripe enough to eat until after they have been stored for at least a few weeks.
Potatoes: You may dig up the potatoes when the green vine above your potatoes dies, or you can leave the potatoes in the ground for a few more weeks. After digging your potatoes allow them to age in a shaded well-ventilated area for about two more weeks. Do not put them in the sun because the sun will turn them green and the green toxin that is created is harmful to pregnant women and nursing women and to babies. Remove any loose dirt clinging to the potatoes but do not wash the potatoes. A very thin layer of dirt will help to greatly extend the shelf life of the potatoes. After two weeks in the shade transfer the potatoes into the root cellar. Store them in a wood crate but not a plastic crate. Cover them with straw. They will stay fresh for up to six months.
Tomatoes: Pick while they are still green and before they are ripe. Wrap each tomato in a piece of paper. They will keep for approximately three months. Before using a tomato, remove it and expose it to some warm air and some light and it will finish ripening.
Drying
(Appropriate for Meats, Fruits, and a few Vegetables)
Introduction to Drying:
- The food is placed on a tray or a screen and then dried using a good source of heat, such as the heat of the sun, or an oven at very low temperature, or near a wood-burning fireplace. The drying location must be well ventilated and it should not be in direct sunlight. The drying time will vary considerably depending on the outdoor temperature and the humidity in the air at the time of drying. The guidelines below are rough averages and you will need to check your food every day to determine if it is dry enough.
- Most vegetables cannot be dried because they lose too many nutrients and too much flavor.
- Dry fruit will feel leathery and it will not contain any moisture pockets. It should feel tough but it should not snap when bent.
- You must store dried foods in a moisture free and air-tight container such as glass jars, plastic freezer bags, or plastic food saver containers.
- Store the dried food in a cool dry dark place out of the light between 40ºF to 60ºF (or 4°C to 15°C).
- Dried fruit may be eaten as a snack, or it may be used in a granola recipe, or it may be rehydrated by covering it with warm water for one-hour.
Sun Drying: Dry your food on a hot dry day when the humidity is relatively low. Sun drying requires several consecutive days of 100ºF (38ºC) dry weather. Dry the food in a shaded area and do not place the food in direct sunlight.
Oven Drying: Start at 175ºF (80ºC) for the first 30 minutes to kill any parasites or pathogens in the fruit. Then reduce the oven drying temperature to between 120ºF to 140ºF (50ºC to 60ºC) for fruits. You must frequently turn and rotate the food while it is drying.
How to Dry Meat:
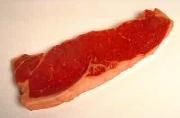 Trim all the fat off the meat. Then cut the lean meat into strips one-inch wide and 1/4-inch thick. Meat should be dried between 165ºF to 185ºF (74ºC to 85ºC) to kill all the potentially harmful microorganisms that might be in the meat. But the temperature should not be so hot that it cooks the meat. The objective is to dry the meat at a safe temperature and not cook it. When the meat snaps or cracks when it is bent then it is dry enough. (Note: Do not discard the fat if the fat is fresh. Instead you should render the fat and then use it strategically in your diet.)
How to Dry Vegetables and Fruit:
Vegetables and fruits that are to be used in a recipe can be processed following the instructions below. To eat the dried fruit, put the dried fruit in some boiling water for 1/2 hour or in some warm water for 1 hour.
Apples: Rinse thoroughly and then slice into thin pieces about 1/4-inch thick. Remove the core and the seeds but do not remove the outside peel. Soak the apples in a solution of water and lemon juice before drying. The drying time for thinly sliced apples is about 3 hours. For apples that have been quartered it takes about 2 or 3 days. The apple is dry when it does not feel moist or sticky.
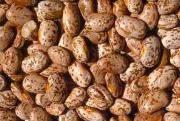 Beans: Most beans, such as kidney beans and pinto beans, do not require any special effort to dry them for future consumption. Pick the bean pod when the beans are fully mature. Leave the beans inside the pods for about two weeks at normal room temperatures to give the beans a chance to harden and to protect them from a multitude of insects. Then remove the beans and discard the pods. The beans will continue to dry at normal room temperatures. (Note: The dried beans may be planted as seed in the spring to produce a fresh crop of beans.) If you would like some ideas on how to cook dried beans then please examine the bean recipes on my web site. Dried beans will remain fresh and easy to cook for at least two years. If you still have some dried beans left over after three years then they will probably require a really long soaking in a water bath and processing inside a pressure cooker to make them soft enough to eat. After four or five years you will probably discover that the dried beans have become too hard to eat and their only use will be add them to your compost pile to produce your own garden fertilizer.
Beets: Rinse thoroughly. Peel the beet and then slice into 1/4-inch thick pieces. Cook the beet pieces. Then drain the beet pieces and dry until they feel leathery.
Blueberries: Sort out any defective blueberries and any twigs or stems. Thoroughly rinse the good blueberries. Place in a single layer on a screen or tray. They will dry in about 5 or 6 days in a warm location or about 4 hours inside an oven at very low temperature (120°F to 140°F or 50ºC to 60ºC).
 Cherries: Rinse thoroughly and then remove the pit. Place on a drying tray in a single layer where the cherries do not touch each other. They will dry in about 4 days outdoors. Or dry in an oven at 140°F (60ºC) for about 6 hours. They should feel leathery and slightly sticky. Do not over-dry the cherries. However, it is better to have them a little too dry than not dry enough because if they aren't dry then mold will develop on the cherries. Store the dried cherries in an airtight container.
Corn, Reid's Heirloom Yellow Dent Corn: After this heirloom yellow corn has fully ripened you have two options:
- You can eat some of the corn fresh, and
- You can pull up some of the stalks with the corn still attached. Peel back the husks. Hang the corn on their stalks upside down in a well-ventilated area for four more weeks. Wait until the kernels are hard and dry. Twist off the full kernels of corn using your hands. Discard the small kernels near the end of the cob. As you need it, you may grind the dried corn into corn meal and use it in a cornmeal recipe to make corn bread, hush puppies, nacho chips, taco shells, or corn batter for corn dogs (you can substitute canned Vienna sausages for the hot dogs). (Note: The dried corn kernels are also "corn seed" and you may plant them in the spring to produce another fresh crop of corn.)
Figs: Wash the figs. Boil some water and add two fig leaves. Then quickly dip each fig in the boiling water for three seconds and then immediately remove it. Cut the fig in half. Place them skin side down on a drying tray. Keep the figs separated and dry outdoors. Or dry in a 130ºF (54ºC) oven for about 5 hours.
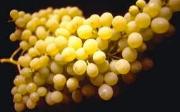 Grapes: After the dew has dried off them but before midday you should harvest the grapes with about 3 inches of stem attached. The stem enhances the flavor during the drying process. Rinse thoroughly. Dip in boiling water for 30 seconds to crack the skins. Hang the grapes up by their stems and let them dry naturally in a warm room with no extra heat. They will turn into raisins. They are dry when the center of the raison contains no moisture. Seedless grapes are best for making raisins.
Onions: Harvest the onions immediately after the tops die and fall over. Rinse thoroughly and then slice into round slices such as for a hamburger, or dice into small cubes. Place on a tray and dry using the heat of the sun. Or dry at 120ºF (50ºC) for about 24 hours, stirring the onions every 8 hours.
Peaches: Rinse thoroughly and then slice into quarter sections and remove the stone. Place on a drying tray. Turn the peach quarters over every four hours.
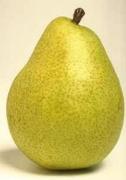 Pears: Rinse thoroughly and then slice into halves. Place on a drying tray and cover with a cloth. Dry using the heat of the sun for about six days. Or cut the fresh pears into quarters and they will dry in about three days. Or dry near a wood stove for about two days.
Peppers (Sweet): Rinse thoroughly and then slice into pieces no more than one-inch wide. Remove the seeds. Allow them to dry slowly on a drying tray.
Potatoes: Rinse thoroughly. The skin may be left on or peeled off. Cut into 1/8-inch thick round slices. Put the sliced potatoes in boiling water for 8 minutes. Then transfer the potatoes to cool water or ice water for 15 minutes. Dry the potatoes with a paper towel or a clean cloth towel. Dry the potatoes using the heat of the sun, or an oven, or a wood-burning fireplace until the potato slices are dry and crisp.
Plums: Rinse thoroughly and then slice into halves and remove the pit. Place on a drying tray and cover with a cloth. Dry using the heat of the sun for about four days.
Spinach: Select clean fresh leaves and do not rinse them. Place them individually on a drying tray in a warm location. The leaf is dry enough when the leaf breaks easily when you bend it. To prepare for eating boil the dried leaves in water.
 Strawberries: Rinse thoroughly and then slice into halves. Place the cut side up on a tray and dry using the heat of the sun.
Tomatoes: Plum tomatoes, such as the Roma tomato, dry well. The Beefsteak tomato also dries well. Rinse thoroughly. Dip briefly in boiling water to loosen the skins. Remove the skins. Slice the tomato in half or quarters and remove all the seeds. (Note: Save the seeds and dry them on a piece of paper and then plant the dried seeds the following spring to produce a fresh crop of tomatoes.) Sprinkle some salt on a drying tray and place the tomato halves on the salted tray. Cover and dry in the sun. Turn the tomatoes over every four hours during the day. Bring the tomatoes indoors at night. Store in glass jars when dry. If you wish you may cover the tomatoes in oil inside the jar.
Turnips: Rinse thoroughly and then slice into 1/8-inch thick pieces. Push a thin wire or a string (attached to a needle) through each slice and then hang the slices so the slices cannot touch and dry in a warm area for 10 to 14 days. Then place the turnips on a cookie sheet and heat in a 160ºF (71ºC) oven for five minutes. Allow to cool and then store. This method will preserve the turnips for up to five years.
Respectfully,
Grandpappy.
Grandpappy's e-mail address is: RobertWayneAtkins@hotmail.com


 Leave the vegetables in the original ground where they grew during the summer.
 Onions: Allow them to dry thoroughly. Then tie them together in small bunches and hang them upside down from a string or a wire. White and yellow onions store well but red onions do not store well.
 Trim all the fat off the meat. Then cut the lean meat into strips one-inch wide and 1/4-inch thick. Meat should be dried between 165ºF to 185ºF (74ºC to 85ºC) to kill all the potentially harmful microorganisms that might be in the meat. But the temperature should not be so hot that it cooks the meat. The objective is to dry the meat at a safe temperature and not cook it. When the meat snaps or cracks when it is bent then it is dry enough. (Note: Do not discard the fat if the fat is fresh. Instead you should render the fat and then use it strategically in your diet.)
 Beans: Most beans, such as kidney beans and pinto beans, do not require any special effort to dry them for future consumption. Pick the bean pod when the beans are fully mature. Leave the beans inside the pods for about two weeks at normal room temperatures to give the beans a chance to harden and to protect them from a multitude of insects. Then remove the beans and discard the pods. The beans will continue to dry at normal room temperatures. (Note: The dried beans may be planted as seed in the spring to produce a fresh crop of beans.) If you would like some ideas on how to cook dried beans then please examine the bean recipes on my web site. Dried beans will remain fresh and easy to cook for at least two years. If you still have some dried beans left over after three years then they will probably require a really long soaking in a water bath and processing inside a pressure cooker to make them soft enough to eat. After four or five years you will probably discover that the dried beans have become too hard to eat and their only use will be add them to your compost pile to produce your own garden fertilizer.
 Cherries: Rinse thoroughly and then remove the pit. Place on a drying tray in a single layer where the cherries do not touch each other. They will dry in about 4 days outdoors. Or dry in an oven at 140°F (60ºC) for about 6 hours. They should feel leathery and slightly sticky. Do not over-dry the cherries. However, it is better to have them a little too dry than not dry enough because if they aren't dry then mold will develop on the cherries. Store the dried cherries in an airtight container.
 Grapes: After the dew has dried off them but before midday you should harvest the grapes with about 3 inches of stem attached. The stem enhances the flavor during the drying process. Rinse thoroughly. Dip in boiling water for 30 seconds to crack the skins. Hang the grapes up by their stems and let them dry naturally in a warm room with no extra heat. They will turn into raisins. They are dry when the center of the raison contains no moisture. Seedless grapes are best for making raisins.
 Pears: Rinse thoroughly and then slice into halves. Place on a drying tray and cover with a cloth. Dry using the heat of the sun for about six days. Or cut the fresh pears into quarters and they will dry in about three days. Or dry near a wood stove for about two days.
 Strawberries: Rinse thoroughly and then slice into halves. Place the cut side up on a tray and dry using the heat of the sun.
