


 This article discusses the following topics in the following sequence on this page.
 There are three possible future scenarios regarding the supply of factory-loaded ammunition:
 |
 |
 |
| Shotgun Shells | Rimfire 22 Ammo | Centerfire Ammo |

| Diameter | Pistol | Rifle |
| 0.175 inches | Small Pistol | Small Rifle |
| 0.210 inches | Large Pistol | Large Rifle |
| Primer Size | CCI Number | Federal | Magtech | Remington | Winchester |
| Small Pistol | 500 | 100 | 1 1/2 | 1 1/2 | 1 1/2 |
| Large Pistol | 300 | 150 | 2 1/2 | 2 1/2 | 7 |
| Small Rifle | 400 | 205 | 7 1/2 | 6 1/2 | 6 1/2 |
| Large Rifle | 200 | 210 | 9 1/2 | 9 1/2 | 8 1/2 |
| Primer Size | Firearm Calibers |
| Small Pistol | 25 Auto, 32 Auto, 380 Auto, 9 mm Luger, 38 Special, 357 Sig, 357 Magnum, 40 S&W, 45 GAP |
| Large Pistol | 10 mm Auto, 41 Remington Magnum, 44 Magnum, 45 Auto |
| Small Rifle | 222, 223 (NATO 5.56x45), 25-20, 30 M1, 32-20 |
| Large Rifle | 243, 250, 25-06, 270, 284, 30-30, 300, 303, 307, 308 (NATO 7.62x51), 30-06, 356, 358, 375, 444, 45-70, 450, 6 mm, 7 mm, 7.62x39 mm, 8 mm, 9.3x62 mm |
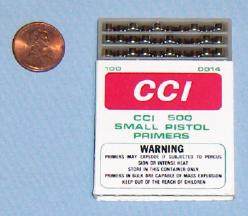 If you look at the above list it becomes obvious that the two most widely used primers are Small Pistol primers and Large Rifle primers. If you can find these primers for sale then you should consider making an investment in them.
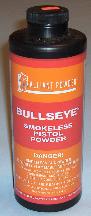 There are two basic types of gunpowder:
| Caliber = | 380 Auto | 9 mm Luger | 38 Special | 357 Magnum | 40 S&W |
| Bullet Type = | 95 Gr. RN | 115 Gr. RN | 158 Gr. LRN | 125 Gr. TMJFN | 155 Gr. TMJFN |
| AA No. 5 Powder = | 4.6 Gr. | 6.0 Gr. (4.6/6.0 = 77%) | 5.6 Gr. (4.6/5.6 = 82%) | No Data | 7.9 Gr. (4.6/ 7.9 = 58%) |
| AA No. 7 Powder = | 5.9 Gr. | 8.6 Gr. (5.9/8.6 = 69%) | No Data | 12.0 Gr. (5.9/12.0 = 49%) | 10.0 Gr. (5.9/10.0 = 59%) |
| Bullseye Powder = | 3.0 Gr. | 4.2 Gr. (3.0/4.2 = 71%) | 3.1 Gr. (3.0/3.1 = 97%) | No Data | 5.4 Gr. (3.0/5.4 = 56%) |
| H. Universal Powder = | 3.6 Gr. | 4.7 Gr. (3.6/4.7 = 77%) | 4.2 Gr. (3.6/4.2 = 86%) | 7.5 Gr. (3.6/7.5 = 48%) | 6.2 Gr. (3.6/6.2 = 58%) |
| Unique Powder = | 3.8 Gr. | 5.6 Gr. (3.8/5.6 = 68%) | 4.0 Gr. (3.8/4.0 = 95%) | 8.6 Gr. (3.8/8.6 = 44%) | 7.2 Gr. (3.8/7.2 = 53%) |
| Average % = | - | (72%) | (90%) | (47%) | (57%) |
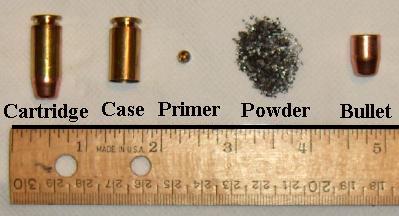
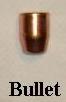 The bullet is the projectile in the top of the ammunition cartridge. Although all four components in the cartridge are necessary and each makes its own contribution to reliability and accuracy, it is the bullet that actually does the work. The bullet leaves the cartridge shell casing behind and travels towards its target to accomplish its objective.
| Metal | Lead | Antimony | Tin | Arsenic | No Heat Treatment | After Heat Treatment |
| Linotype | 84% | 12% | 4% | 0% | 22 BHN | 24 to 25 BHN |
| Wheel Weights (Clip-On Type) | 95.3% | 4% | 0.5% | 0.2% | 7 to 9 BHN | 18 to 30 BHN |
| Wheel Weights Plus Extra Tin | 93.8% | 4% | 2% | 0.2% | 7 to 9 BHN | 18 to 30 BHN |
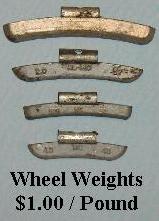 Wheel weights are the small pieces of metal that are attached to the rim of your wheels when you have your tires balanced.
| Bullet Grain Weight | Number of Bullets Made |
| 110 Grain Bullet | 63 Bullets per Pound |
| 170 Grain Bullet | 41 Bullets per Pound |
| 230 Grain Bullet | 30 Bullets per Pound |
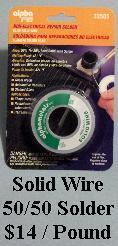 The most common source of tin is from commercial solder.
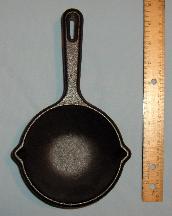 |
 |
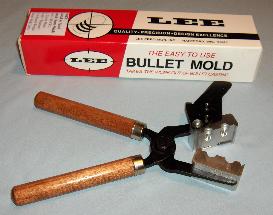 |
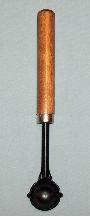
| Cast Iron Melting Pot ($14) | Cast Iron Ladle ($8) | Lee 2-Cavity Bullet Mold with Handles ($19) |
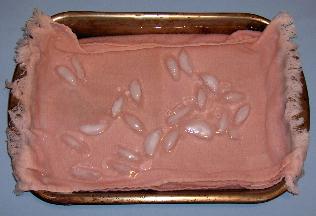 A shallow plastic pan or metal pan about two-inches deep may be used for quenching. (This pan should never be used for anything except bullet quenching to avoid lead poisoning.) Fold a towel and place the folded towel in the bottom of the quenching pan (or use two smaller hand towels). Then fill the quenching pan with cool water and a few ice cubes. The folded towel (or two small hand towels) should be at least one-inch below the top surface of the cool water. Cool water quenching needs to be started as soon as possible after you remove the hot bullet from the bullet mold. However, you should never drop a hot bullet from the mold directly into the quenching water. If any water splashes onto your hot mold it could damage the mold. Or the water may later drop off the wood mold handle into the molten metal inside the melting pot and this would be dangerous. Therefore, if you are wearing heat resistant gloves, or if you have an assistant, then transfer the hot bullets from the dry towel onto the wet towel inside the cool water bath as soon as possible after removing them from the bullet mold to maximize the heat treating process. Be careful to not let any water splash onto your gloves or you will be transferring the water to your melting pot area and this would be dangerous.
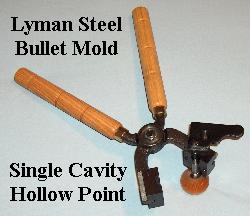 Lyman Steel Bullet Molds (picture on right):
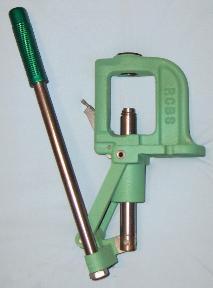 |
 |
| RCBS Reloading Press | 3 Piece Die Set for Handgun Ammo |
 |
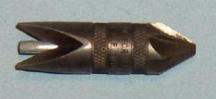 |
| Shell Holder | Deburring Tool |
 |
 |
 |
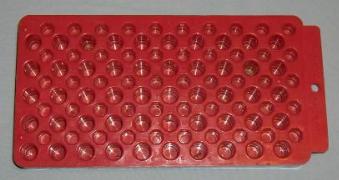
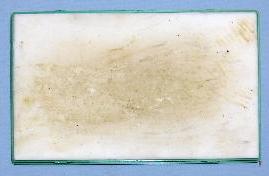
| Plastic Block for Holding Brass Cases | Case Lube Pad | Primer Holding Tray |
 |
 |
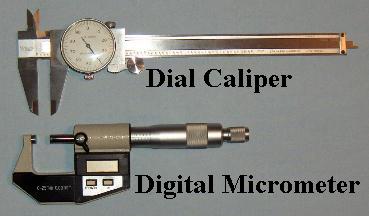 |
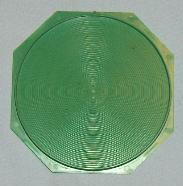
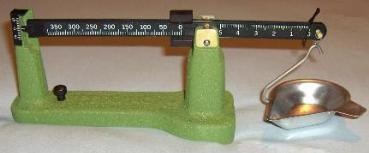
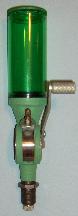
| Powder Weight Scale | Powder Measure | Two Measurement Gages |
 |
 |
 |
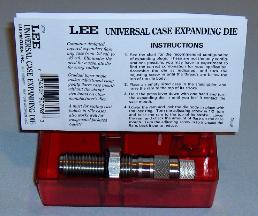
| Universal Case Expanding Die ($12) | Speer Reloading Manual ($39) | Lyman Reloading Handbook ($23) |
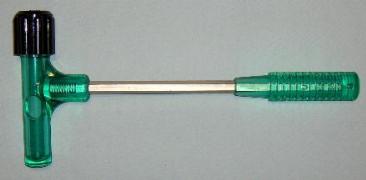 Kinetic Inertial Bullet Puller: To safely remove a bullet from a live cartridge you will need a kinetic inertial bullet puller. A bullet puller looks like a hammer. The bullet puller illustrated in the picture on the right is a universal puller and it will work with most handgun and rifle calibers.
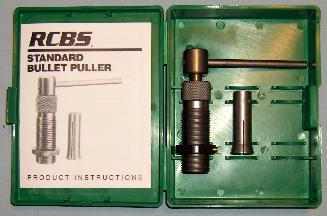 RCBS Bullet Puller with Collet Purchased Separately: Bullets can also be removed using a standard reloading press and a special collet die holder and a collet die of the correct diameter that matches the diameter of the jacketed bullet you wish to remove. RCBS makes this special collet die holder (Midway part number 680804, price $21.49) and the individual collet dies for each bullet caliber (price $12.49 each). Using your reloading press to remove a jacketed bullet is easier than using the above kinetic inertial bullet puller.
 Lee makes a Universal Depriming and Decapping Die (Lee part number 90292) that can be used on all caliber brass shell cases (price about $10.00). The inside of the die is larger than the outside of the biggest brass shell case. And the decapping pin is in the exact center of the die. Therefore, if you have a shell holder of the correct size, this die can be used to remove the primer from any size brass case. One of the places on the internet where this item can be purchased is MidwayUSA.com (Midway part number 136543). Or you may be able to find this special die at your local gun shop.